Posts

Showing posts with the label illustrator

Drawing twirls in Illustrator
Image
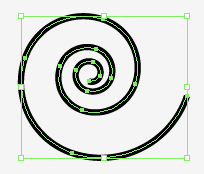
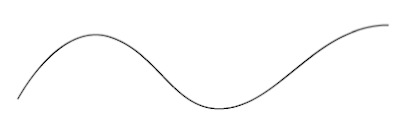
In Illustrator you can make your own brushes which makes it so much easier to draw twirly branches and twirls in general. Here's a tut about how to make fancy twirls in Illustrator. First of all draw a nice curvy line with either the pen tool or which ever tool you prefer. Make a spiral with the spiral tool. Join the ends of the spiral and the curvy line by selecting the two ends with the direct selection tool (hollow arrow) and either hitting command J or via the menu Object>Path> Join. Illustrator will join the two lines. If the anchor points are on top of each other then a 'Join' panel will appear. Select the option smooth. The 'wave' and the spiral have now become one line. Draw some more branches using the method above. make sure the branches overlap each other as shown below. Now we are going to make a brush. Draw a triangle as shown below. Select the triangle and drag it into the Brushes panel. The New Brush panel will appear. Select 'New Art brush...

Illustrator tip. Quick cool waves

Image
Cool and colourful waves, that may look complicated, but can easily be made in illustrator. Here's how I made the wave at the end of this post. Draw a squigly line with the pen tool. make sure the fill is set to none. Select the line with the Selection tool and while holding down the Alt and Shift keys drag a copy of the line below or above the original. Double click the Blend tool in the toolbox to open the Blend Options panel. Set the spacing to Specified Steps and enter a value of 6. Click OK. Click with the Blend tool tip on an anchor point and then on the 'same' anchor point on the other line. (The tip of the blend tool fills when hovering above an anchor point.) Activate the Direct selection tool (open arrow) click and drag any of the anchor points. In this example I moved several of the anchor points and changed the colour of the bottom line to create the gradient. You can even add anchor points to change the shape of the wave.

illustrator tip:Rounded rectangle

Image
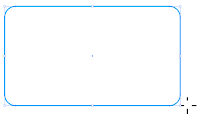
So I haven't been active for a while on my blog, that's because I have been keeping a dutch one for my work. Which I suppose I could easily translate and copy to here, uhmm… bad excuse, however that sounds better then I don't have time because we got a puppy, which is the truth. Boy, puppies need a lot of time, but she is worth it. Well here's the tip. When you use the rounded rectangle tool by dragging, the corner radius used is the last value entered in the rounded rectangle panel's corner radius field. The size you determine by dragging, hold down the Space bar to change the position and hold down the Alt key to draw from the centre. Here's how you can alter the corner radius while dragging. 1. Select the rounded rectangle tool and drag a rectangle. Do not release the mouse. 2. Use the up arrow to increase the corner radius. use the down arrow to decrease the radius. The left arrow makes it a rectangle and the left arrow gives you the maximum corner radius. ...

Illustrator tip: Resizing your artboard in CS4

Image
This tip is only for CS4 users. (IMHO it's worth getting if you don't have it yet ) Say you've made an illustration on an A4 sized artboard, but your illustration is a lot smaller and you want to get rid of the excess white paper. That can easily be solved. In the example below the black stroke is the A4 paper. 1. Draw a rectangle on top of the illustration. This will be your new page size. Make sure the rectangle is selected. 2. Select the Artboard Tool (shift o) to select the A4 artboard. 3. Double click on the rectangle. The rectangle now becomes the new page size. 4. Select the rectangle with the direct selection tool and delete it. You now have an artboard (page) the same size as the rectangle. And because it is fun friday check out this site Logolounge . Actually this is serious stuff for designers.

Live paint

Image
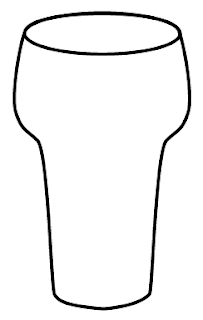
Live paint is an function in Illustrator which in my opinion doesn't get enough attention and it is a powerful tool. Pathfinders cut the shapes into separate shapes whereas live paint leaves the objects editable it's non destructive. Here's a simple example of a simple info graphic illustration made with live paint showing the average beer consumption. 1. I drew a typical dutch beer glass. 2. With the pen tool i drew a line marking the top of the beer (beer line). 3. Select the glass and 'beer line', select the live Paint tool in the toolbox and click to make a live paint group. You can also go to Object> Live Paint> Make. 4. The separate parts of the illustration will now have a thick red border when hovering above them to show you the live paint sections. When selected the anchor points with the crosshairs shows you that it is a 'Live Paint Group' 5. Select a yellow swatch, select the Live paint tool and click in the lower part of the glass. 6. Selec...

Colour Picker

Image
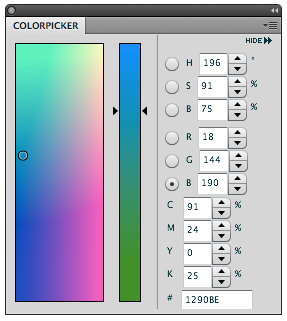
Via John Nacks blog I was shown a very useful panel for Photoshop CS4. If you install this panel then a Colour Picker panel will be added to Photoshop. This makes it easier and quicker to select colours. To download the panel click on this link to Anastasiy Safari. You need to extract the zip file. Place the whole folder in Applications> Adobe Photoshop CS4> Plug-Ins>Panels Folder. Restart Photoshop. Open the panel via Window> Extensions Because it is a CS4 panel it can be displayed in several ways. For example a simple button. Now that we are talking about the colour picker. Of course you all know that not all colours seen on screen are printable. To show the un-printable colours directly in the colour Picker go to the View menu> gamut Warning. The colour picker will grey out the un- printable colours. If you go to Image> Mode> 32 bit the colour picker will look completely different. InDesign and Illustrator contain a Colour picker dialogue box. Double click on ...

Illustrator tip Mirror images

Image
Ever heard of the Rorschach inkblot test? Good news you can draw them yourself in Illustrator. Who knows you may find out more about your inner self. It works as follows 1. Draw an object and select it. 2. Go to Effect> Distort and Transform> Transform. 3. Enter the following values and check the Reflect Y. Make sure the reference point is below and centre and set copies to 1. Click OK. A copy of your image will be placed. 4. Select the object. 5. Go to Window> Graphic Styles and click on the new graphic style icon to add the style. Now you can apply this Graphic Styles to any object. 6. You can also apply the style to a layer. Make a new layer. target this layer by clicking on the button. Then click on the graphic style. The style will now be applied to everything you draw.

Geometric shapes in Illustrator

Image
You all know there are several ways to draw a geometric shape in Illustrator. Select the shape in the Toolbox and click and drag across your artboard. Where you click is the top left corner of your rectangle, ellipse or rounded rectangle and it is a fixed point. However a Star or polygon are drawn with the centre as the fixed point. Use the arrow keys, while dragging a star or polygon to increase or decrease the points or sides. To draw a shape with exact dimensions select the shape in the toolbox and click once on your artboard to open the shapes dialogue box. Enter the dimensions. To make a square or a circle you need only fill in one of the dimensions and then click on the word height or width (which ever has not been entered) the text field will automatically be filled with the same value. As reference point, the same applies when using the dialogue box. Where you click is either the centre or left hand corner depending on the shape. By default the rectangle, ellipse and rounded re...