Photoshop Tip: Changing your Canvas size
For many of you this tip might be old hat, but here goes. Of course you know that the crop tool is used to make your canvas smaller. But you can also use this tool to enlarge your canvas.
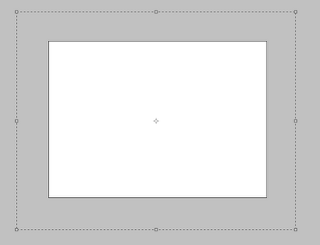
1. Make sure you have a grey area around your canvas. Type F twice for a full Screen Mode with Menu Bar.

2. Drag with the crop tool the size of your canvas.

3. Hold down the Option key and drag an anchor point to enlarge the crop.

4. Hit the return key. Photoshop adds to your original canvas.

Of course you can use the Image menu Canvas Size … But this is so much quicker.
The extra space is filled with the background colour which by default this is white, however in this example the background colour was set to black.
A few keyboard short cuts:
The D key sets the background colour to white and foreground to black.
The X key swithches the back and foreground colours.
5. Use the Option palette if you want a specific size. Enter the size of the canvas you want and drag the Crop Tool. Hold down the Option key and drag an anchor point. The canvas will automatically be the size you entered.

What's even beter is that you save your crop size as a preset. Handy for re-occuring projects, Powerpoint or Web pages.
1. Enter the size and resolution in the Options palette.
2. Select from the preset menu (see diagram) the page icon.

3. By default Photoshop will enter the size and resolution as name, but you can enter any name you want. Click OK.
This crop size will be saved as a preset, ready for use at anytime.
1. Make sure you have a grey area around your canvas. Type F twice for a full Screen Mode with Menu Bar.

2. Drag with the crop tool the size of your canvas.

3. Hold down the Option key and drag an anchor point to enlarge the crop.

4. Hit the return key. Photoshop adds to your original canvas.

Of course you can use the Image menu Canvas Size … But this is so much quicker.
The extra space is filled with the background colour which by default this is white, however in this example the background colour was set to black.
A few keyboard short cuts:
The D key sets the background colour to white and foreground to black.
The X key swithches the back and foreground colours.
5. Use the Option palette if you want a specific size. Enter the size of the canvas you want and drag the Crop Tool. Hold down the Option key and drag an anchor point. The canvas will automatically be the size you entered.

What's even beter is that you save your crop size as a preset. Handy for re-occuring projects, Powerpoint or Web pages.
1. Enter the size and resolution in the Options palette.
2. Select from the preset menu (see diagram) the page icon.

3. By default Photoshop will enter the size and resolution as name, but you can enter any name you want. Click OK.
This crop size will be saved as a preset, ready for use at anytime.


Comments